Some things went as planned; albeit, not as timely as I had hoped. Some things simply didn't happen, and that's O.K. because today was a day about finances and what's really feasible in a pay as we go situation.
Our dogs are citified
We built a little pen, but frankly, I feel like we did it because we bought the materials; not because our dogs were in rural heaven. Ellie Mae spent most of her life in the country, but it became apparent that either her new citified and easy life, or her advance age, has taken the country dog right out of her. She made a couple of sassy attempts to run in the neighboring horse pasture or run away from me towards the road, and then she gave up and got back in the truck.

If that doesn't look like misery, I don't know what does. She's still sleeping it off today. Even so, I started building an 8x8 pen out of t-posts and cattle panel. I tried to get ahead of my help and drive the posts with a hammer. I only succeeded in wearing myself out. My friends, Bev and Lib, arrived with a pile driver, and a pen went up pretty easily.
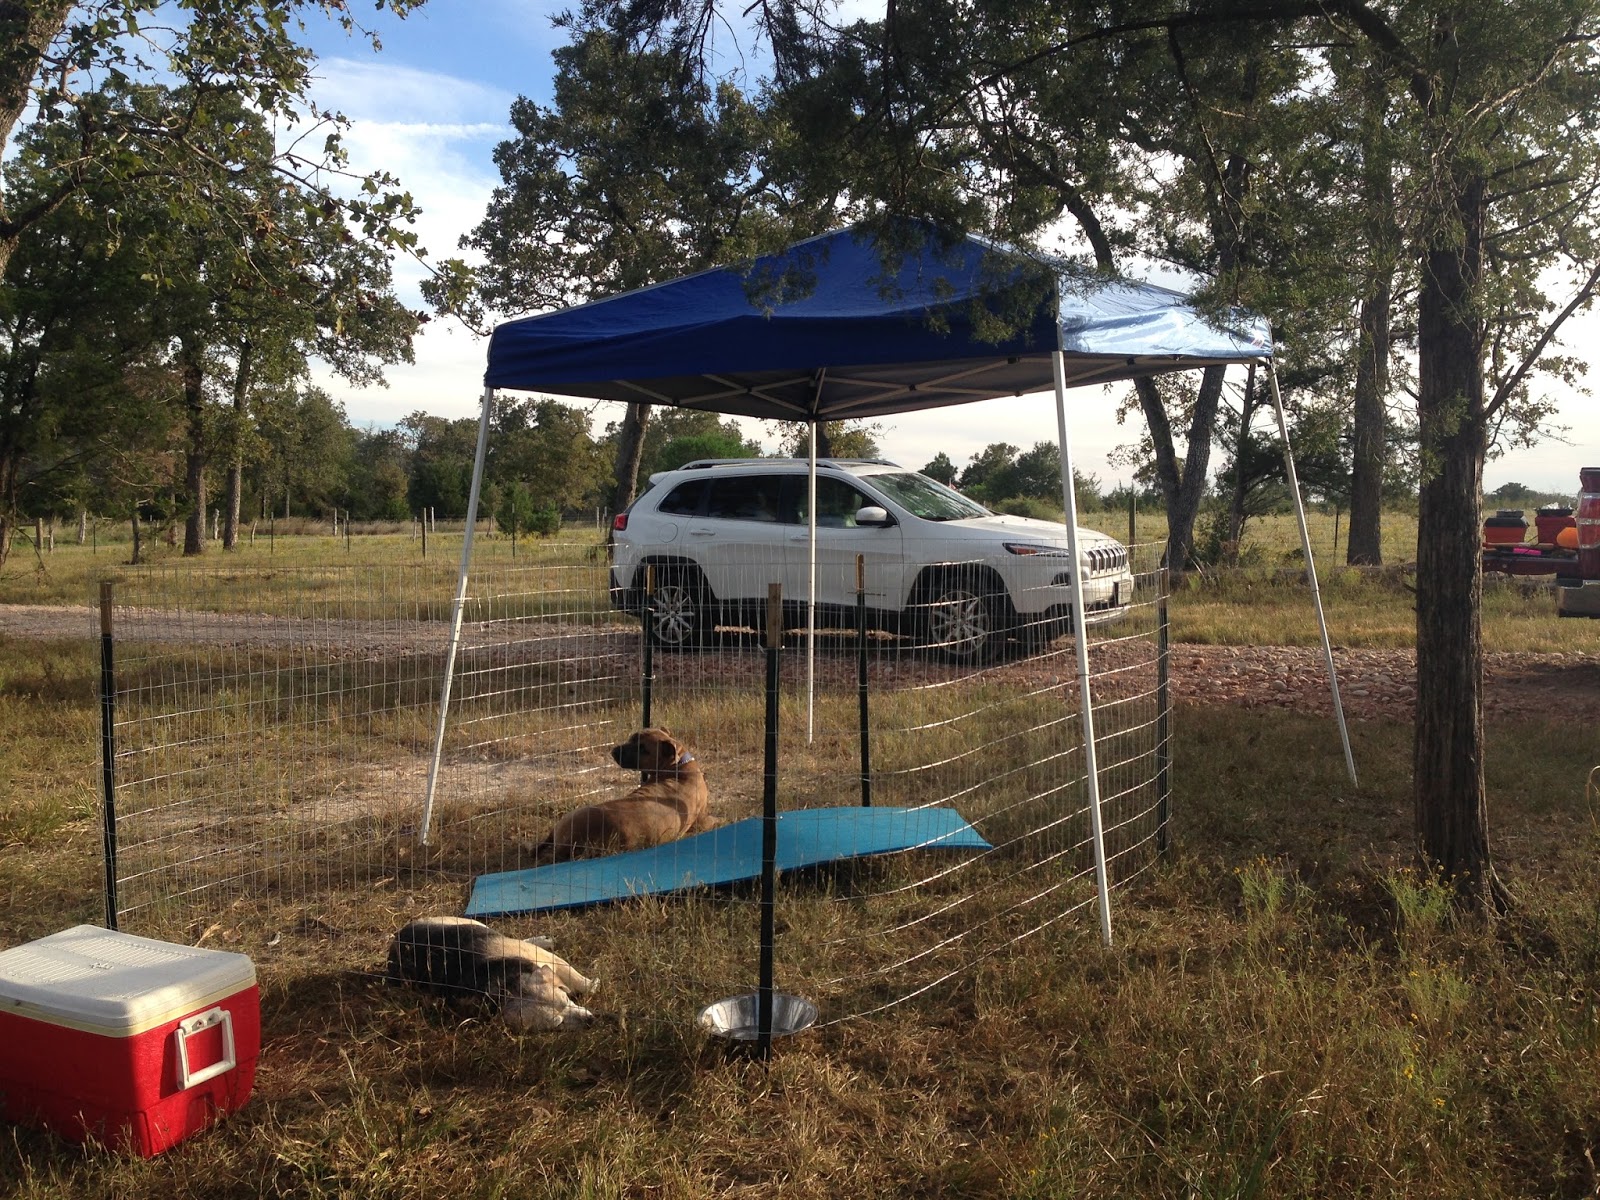
As you can see, despite our efforts to make it shady and comfy, Ellie chose to lay like the dead on the grass. I get it. She can stay home next time.
Plotting out a cabin
After the dogs were secured and sufficiently miserable with rouging it, we set to plotting out a cabin on the new pad. Bev and I squared off a 20x24 foot area on the back of the pad so that we could visualize a footprint. Friends, this sort of activity is why tenth grade geometry was important. It's a practical course if you ever plan to build anything in your life.

Using stakes and string, we started at one of the back corners of the pad and created a square corner. Here's why geometry is important. Every corner has to be perfectly square in order to get two perfectly measured 20 foot sides and two 24 foot sides that don't turn into some weird parallelogram or even worse, a trapezoid geometric mess.
How does one do this without fancy software and/or Google? One uses stakes, a couple of tape measures and pink string. We drove one stake and then eyeballed down a 24 foot line to where we wanted the back wall of a cabin to go. We measured out 4 feet and drove another stake. Then, at a right angle we measured 3 feet and drove a stake. Ideally the distance between the 3 foot and 4 foot stakes is 5 feet. It never is, so adjustments take place until it is correct. It's called the 3,4,5 method. Honestly, 3,4, and 5 is too short to really square a building this size, so we multiplied those distances by 3 and after some struggles with unwanted geometric shapes, manged to square off the area. This means a potential cabin would not end up with impossible doors and windows and such.
How does one do this without fancy software and/or Google? One uses stakes, a couple of tape measures and pink string. We drove one stake and then eyeballed down a 24 foot line to where we wanted the back wall of a cabin to go. We measured out 4 feet and drove another stake. Then, at a right angle we measured 3 feet and drove a stake. Ideally the distance between the 3 foot and 4 foot stakes is 5 feet. It never is, so adjustments take place until it is correct. It's called the 3,4,5 method. Honestly, 3,4, and 5 is too short to really square a building this size, so we multiplied those distances by 3 and after some struggles with unwanted geometric shapes, manged to square off the area. This means a potential cabin would not end up with impossible doors and windows and such.
Discussions and ideas about a cabin
Tammy and I discussed a cabin floor plan at length. Surely, building a cabin would be less expensive than buying a pre-built portable cabin. We figured we could get more space for around the same price as a smaller pre-fab. In March, we found a little portable cabin that measured 336 sq. feet. It wasn't finished out, so we could create any space we wanted on the inside. It also had a little loft that would make a great sleeping space for Elizabeth. It cost around $7200.

This would definitely qualify as a tiny house, and it's kind of ugly, but not hideous. Eventually, we could build a nice big deck around it because we both love the idea of being outside in the country. I sketched up a possible interior which could be done as we have the cash. In the meantime, we at least would have a building to shelter us.

If you imagine every little blue square as one foot, you can see that this is a very cozy space. It's good for sleeping and sitting out rainstorms. The outer lines in the drawing represent decking. That's the place to be. It would be pretty easy to catch rainwater off the gabled roof, and for awhile, a 4,000 watt generator would run a window unit on hot nights, plus minimal lighting. This could work.
I also drew out the cabin we could build, as plotted by our squaring off exercise. It would be 480 square feet, and much roomier on the inside. After some more mathematical figuring and discussion, we decided a lean-to style roof would be most economical, and it would make the interior feel even bigger. I sketched out the the following concept.

By the time we got this done and discussed, we decided to call it a day. Nevermind camping. We came home, and I got up this morning to do some cost estimates.
Spreadsheeting and data swing the decision
Based on mine and Bev's calculations, I came up with a pretty accurate materials list. I created multiple tabs on a spreadsheet. I had a foundation tab, a frame and dry in tab, window and doors tab, plumbing and electric tab, and interior tab. I had a material list, quantity column, and columns for various lumber stores. I started running the numbers. I focused on foundation and dry-in so that I could compare the cost to the pre-fab cabin.
In order to dry in a 480 sq. foot cabin as conceptualized by us, we'd need $10,000. I'm sure I'm overbuilding for such a small space, but realistically, I have a feeling I'm not off by much. Therefore, I've emailed the cabin dealer with the portable we liked, and I'll wait to see what the final cost would be to have it delivered and set up about 16 inches off the ground. I want this so that I can plumb it in the near future. (Read The Trouble with the Toilet on this blog to understand why I need to plumb it ASAP.)
So, next entry, we probably will have made our decision. Stay tuned.
No comments:
Post a Comment